The Best Facade in the Modular Line Has a Secret
If you've built 10270 Bookshop — or even just admired photos of it — you know the Birch Books facade is something special. Three stories of medium nougat brickwork with curved ornamentation, half-circle pillar details, and windowsills that cast tiny shadow lines across the face of the building. It's routinely called one of the best facades in the entire Modular series.
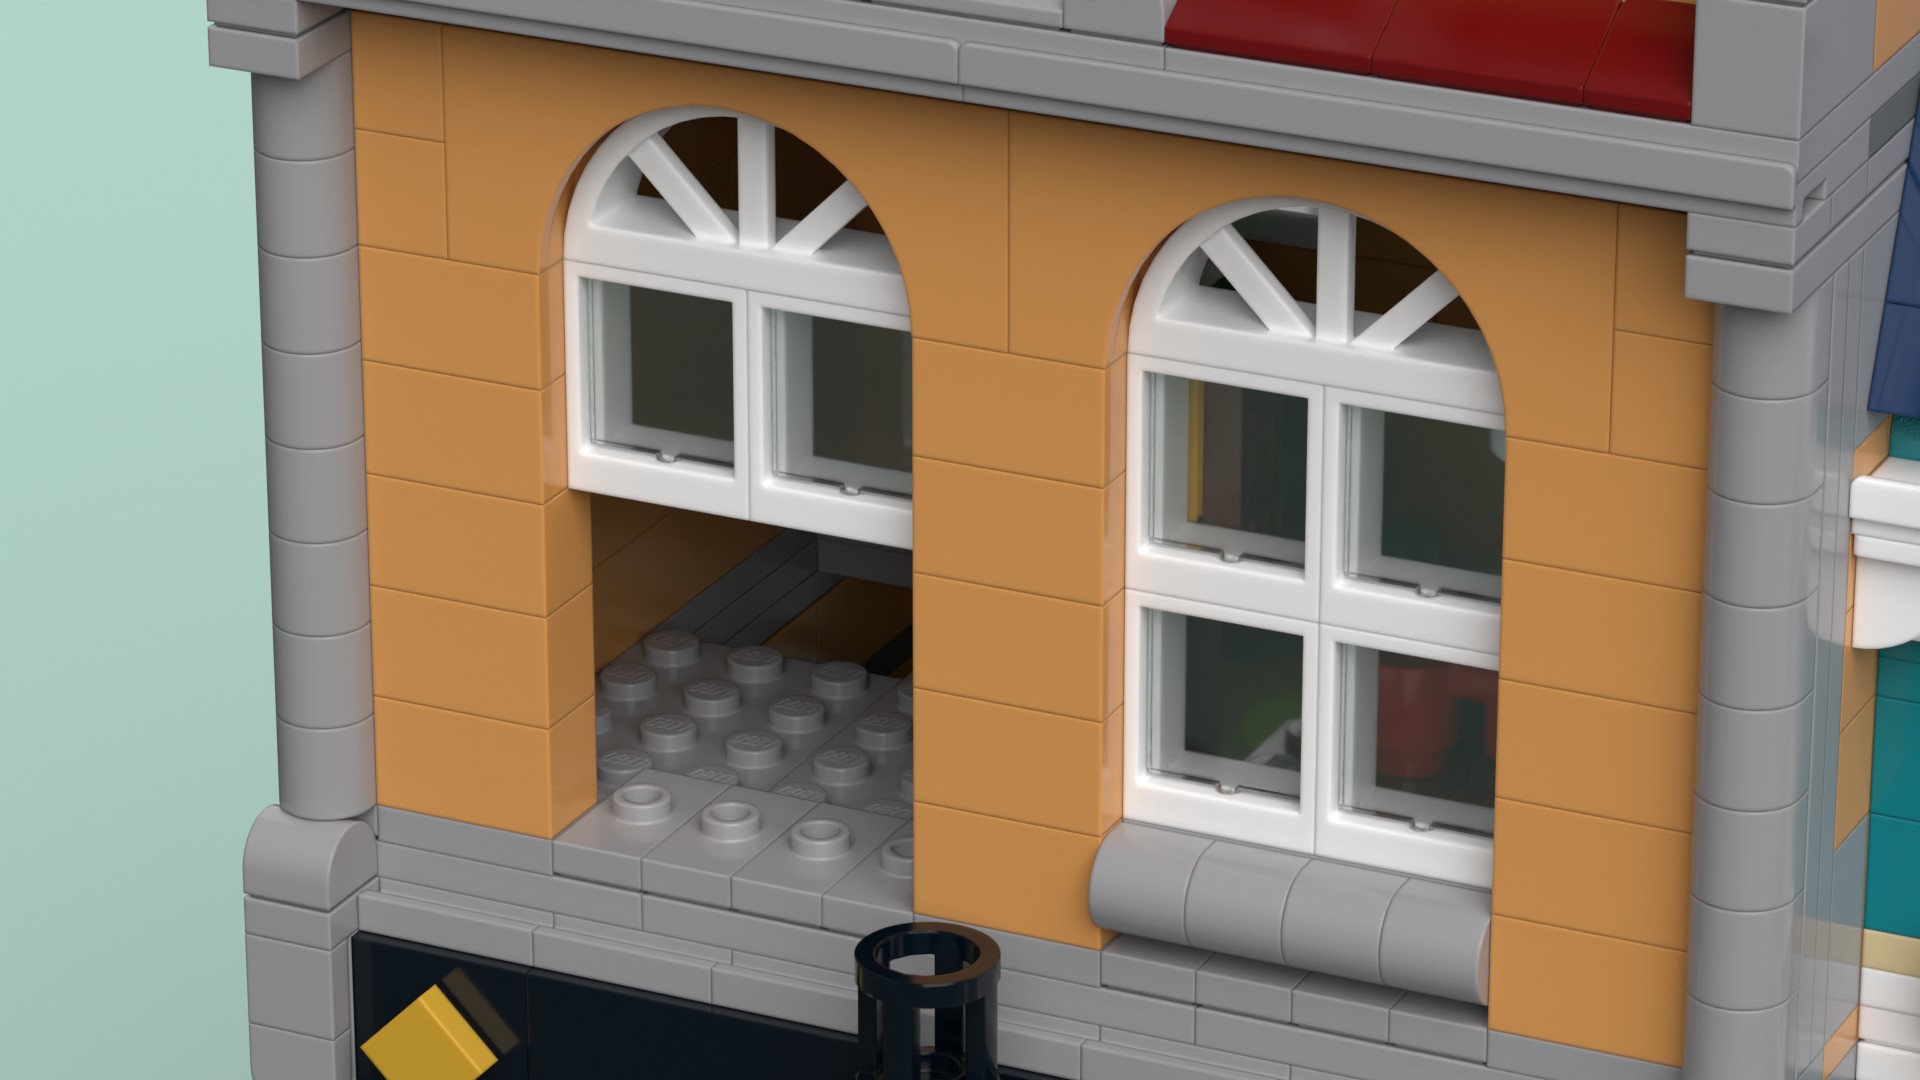
Now look closer at those windowsills. Each one sits just barely recessed from the wall surface — pushed back by the tiniest amount. Not a full stud. Not even close. Just enough that light catches the edge and creates a sliver of shadow. It's the kind of detail your eye registers as "this looks real" without ever consciously noticing why.
Strip away the decorative curved slopes and look at the layer underneath, and you'll find the reason: a flat piece that looks almost like a plate but only has one stud, right in the center. That single centered stud pushed the windowsill assembly back by half a stud from the surrounding wall — and that half-stud recess is the entire difference between a facade that looks flat and one that looks like it was designed by someone who understands how light works.
That modest little piece is called a jumper plate, and it is quietly one of the most important elements in the entire LEGO system.
What a Jumper Plate Actually Does
A standard LEGO plate connects through studs on top and anti-studs on the bottom. Everything snaps to a fixed grid — one stud apart in every direction. You can't place anything between grid positions. If you want a tile centered on a 2-wide wall, too bad. If you want a staggered floor pattern like real hardwood, not possible. Every element locks to the same rigid lattice.
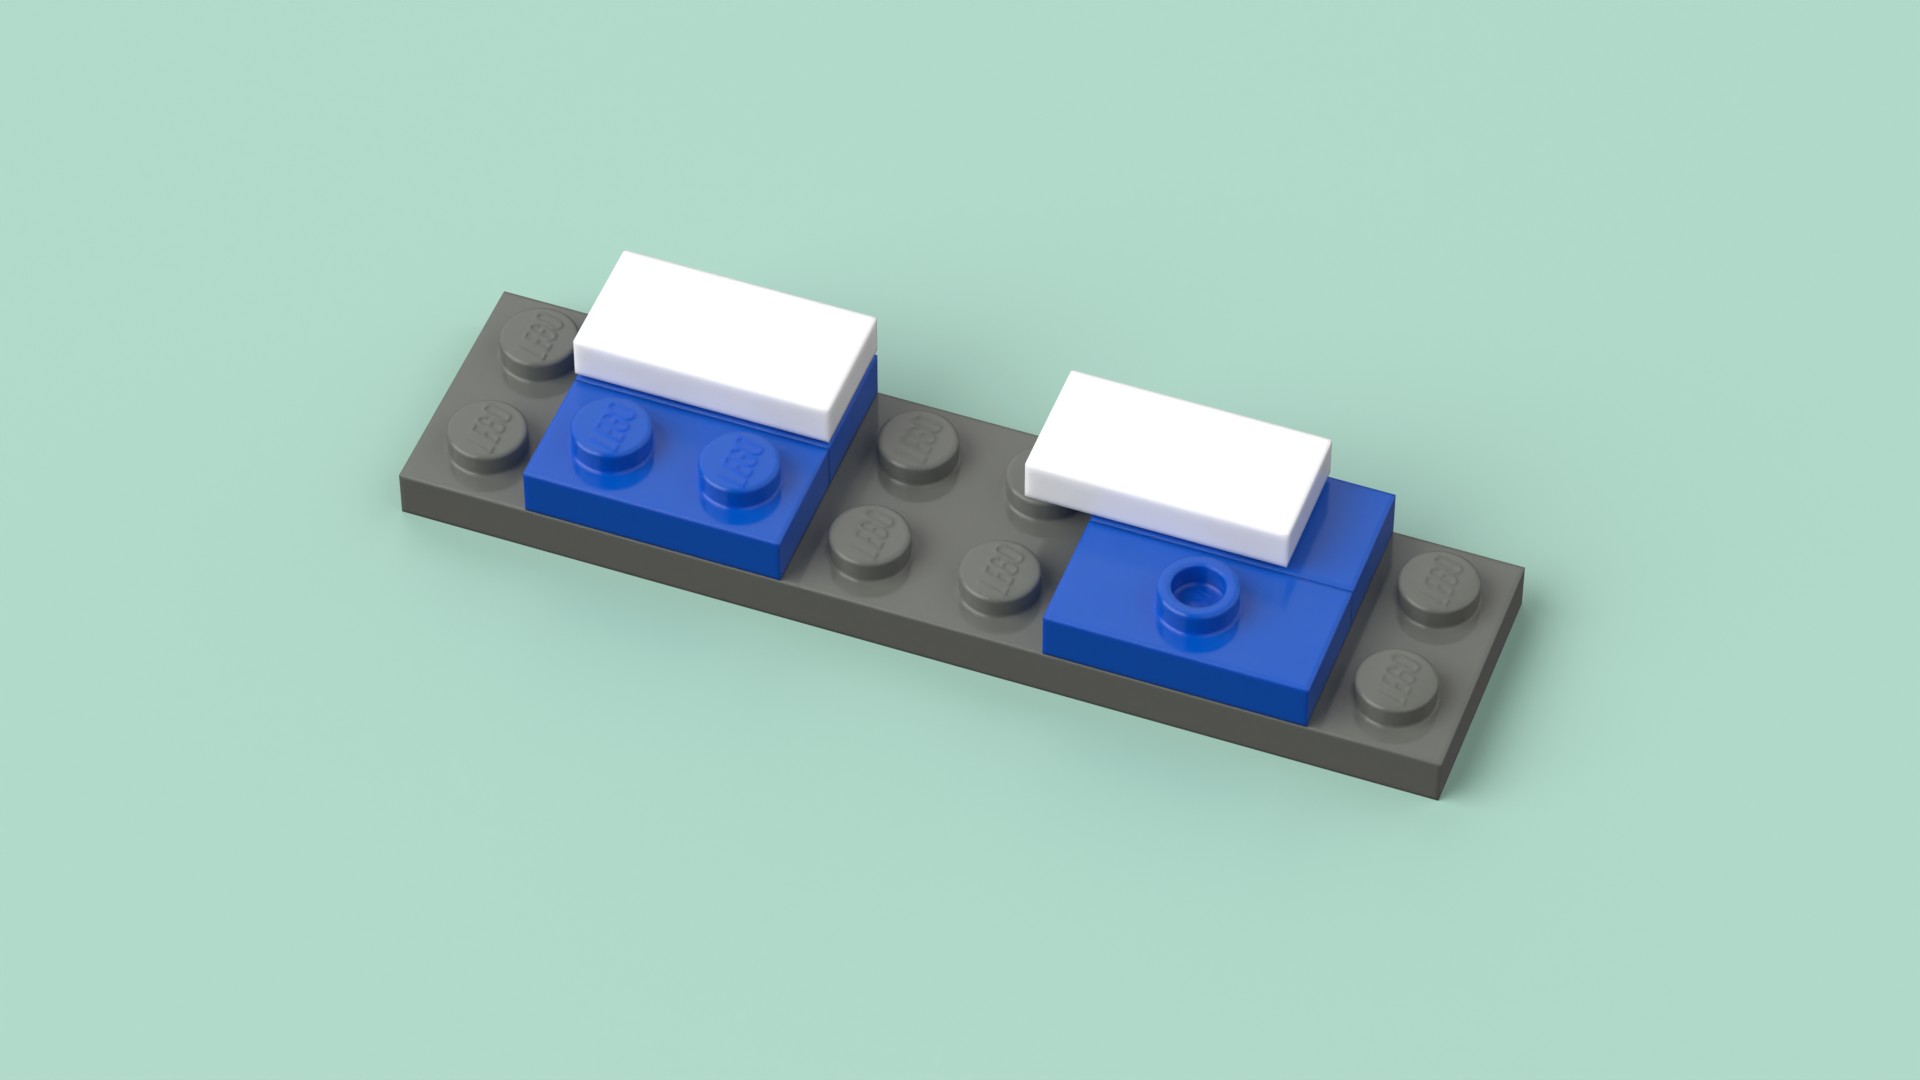
A jumper plate changes this. It's a 1x2 plate with a single stud centered between where the two normal studs would be. Anything you place on that centered stud is shifted by exactly half a stud from the normal grid. That's it. One stud, half a stud over. The concept takes five seconds to understand, and it unlocks an absurd amount of building precision.
The Jumper Family
Like most LEGO parts, the jumper has evolved over the decades. You don't need to memorize the genealogy, but knowing three parts covers virtually everything you'll encounter in sets or need in your own builds.
Part 15573 — The 1x2 Jumper (The One You'll See Everywhere)
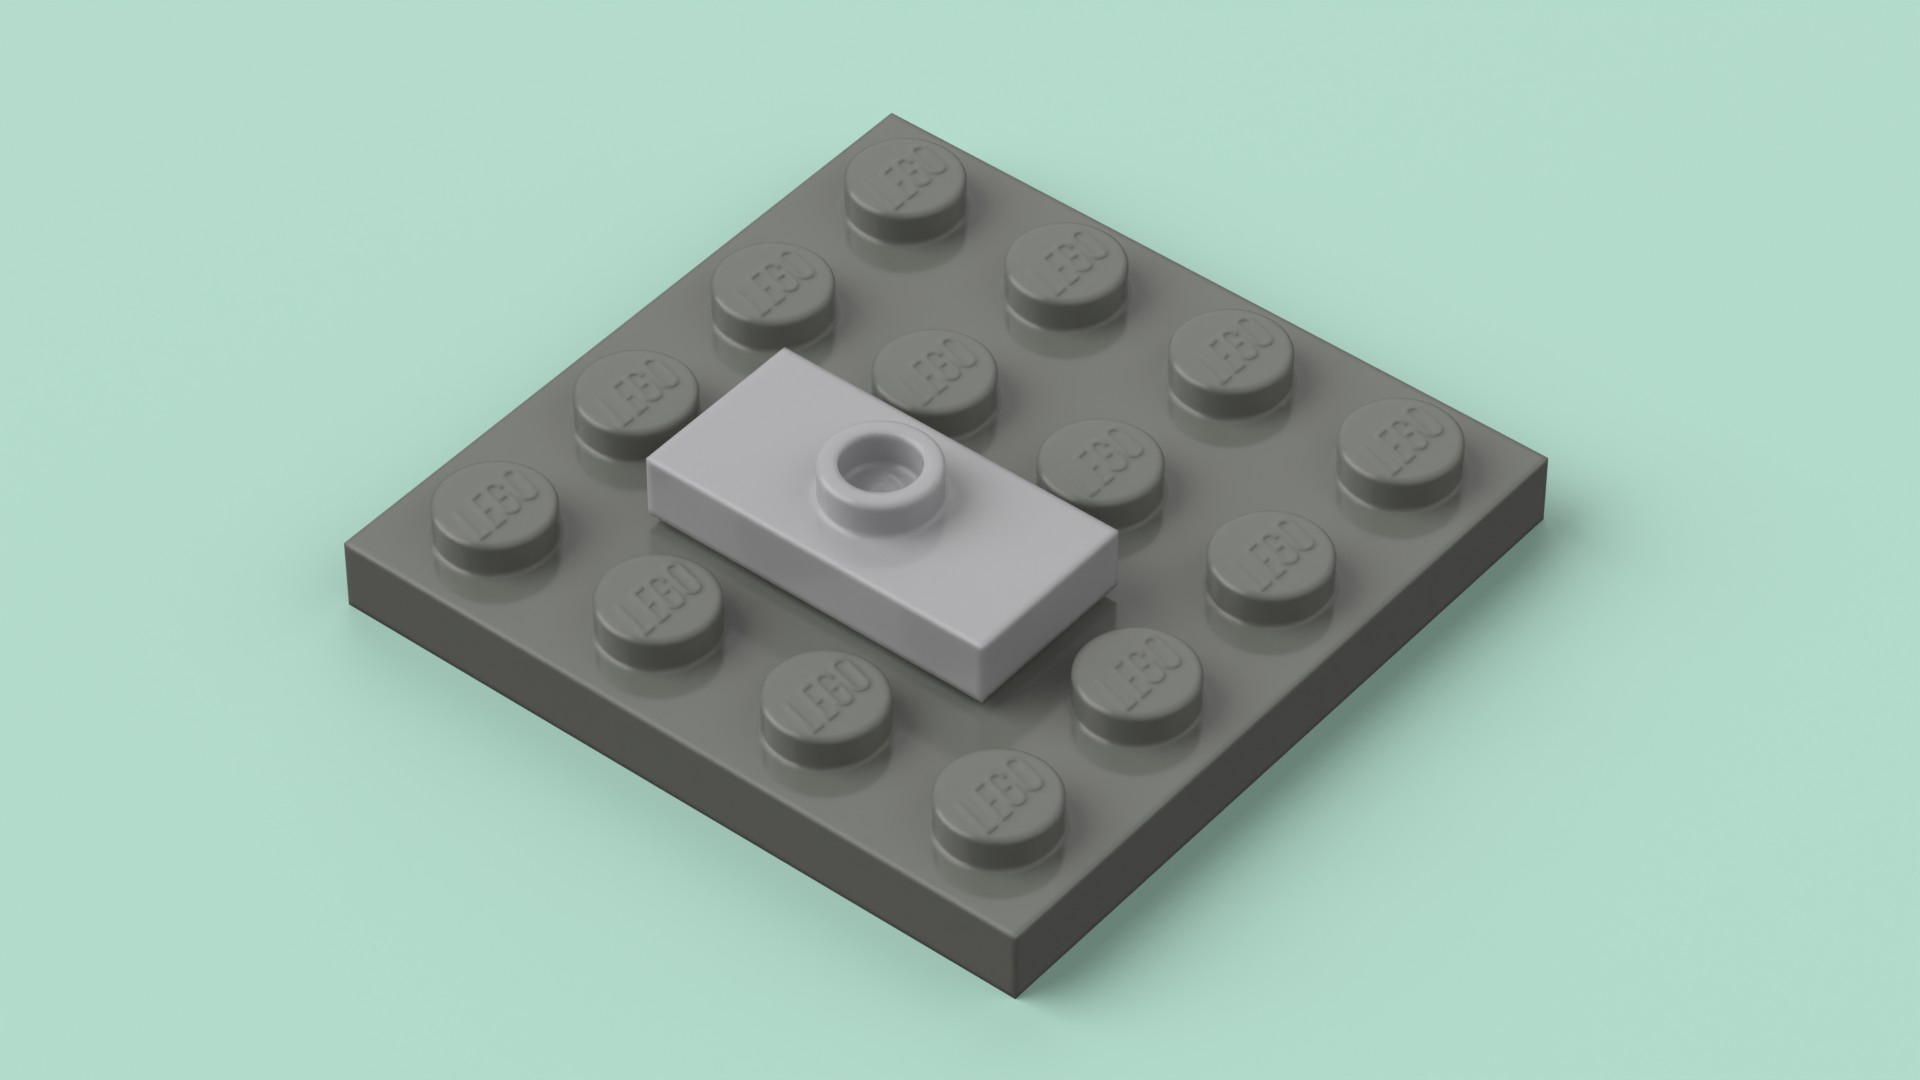
This is the jumper plate. When people say "jumper" without any other qualifier, they mean this. It's a 1x2 plate with one centered stud on top, a groove along the bottom edge for easy removal, and — on the modern version — a stud holder underneath that lets you connect a regular stud from below.
The original version (part 3794) has been around since 1978, making it nearly as old as the headlight brick. But it didn't get its modern form until around 2013, when LEGO added that bottom stud holder. That upgrade was a quiet revolution — it meant you could now build downward from a jumper, not just upward. Balconies, overhangs, inverted details — all suddenly much more stable.
The 1x2 jumper currently ranks in the top 15 most-used LEGO parts across all sets released in recent years, appearing in well over 5,000 sets in more than 40 colors. This is not a niche element. It's everywhere.
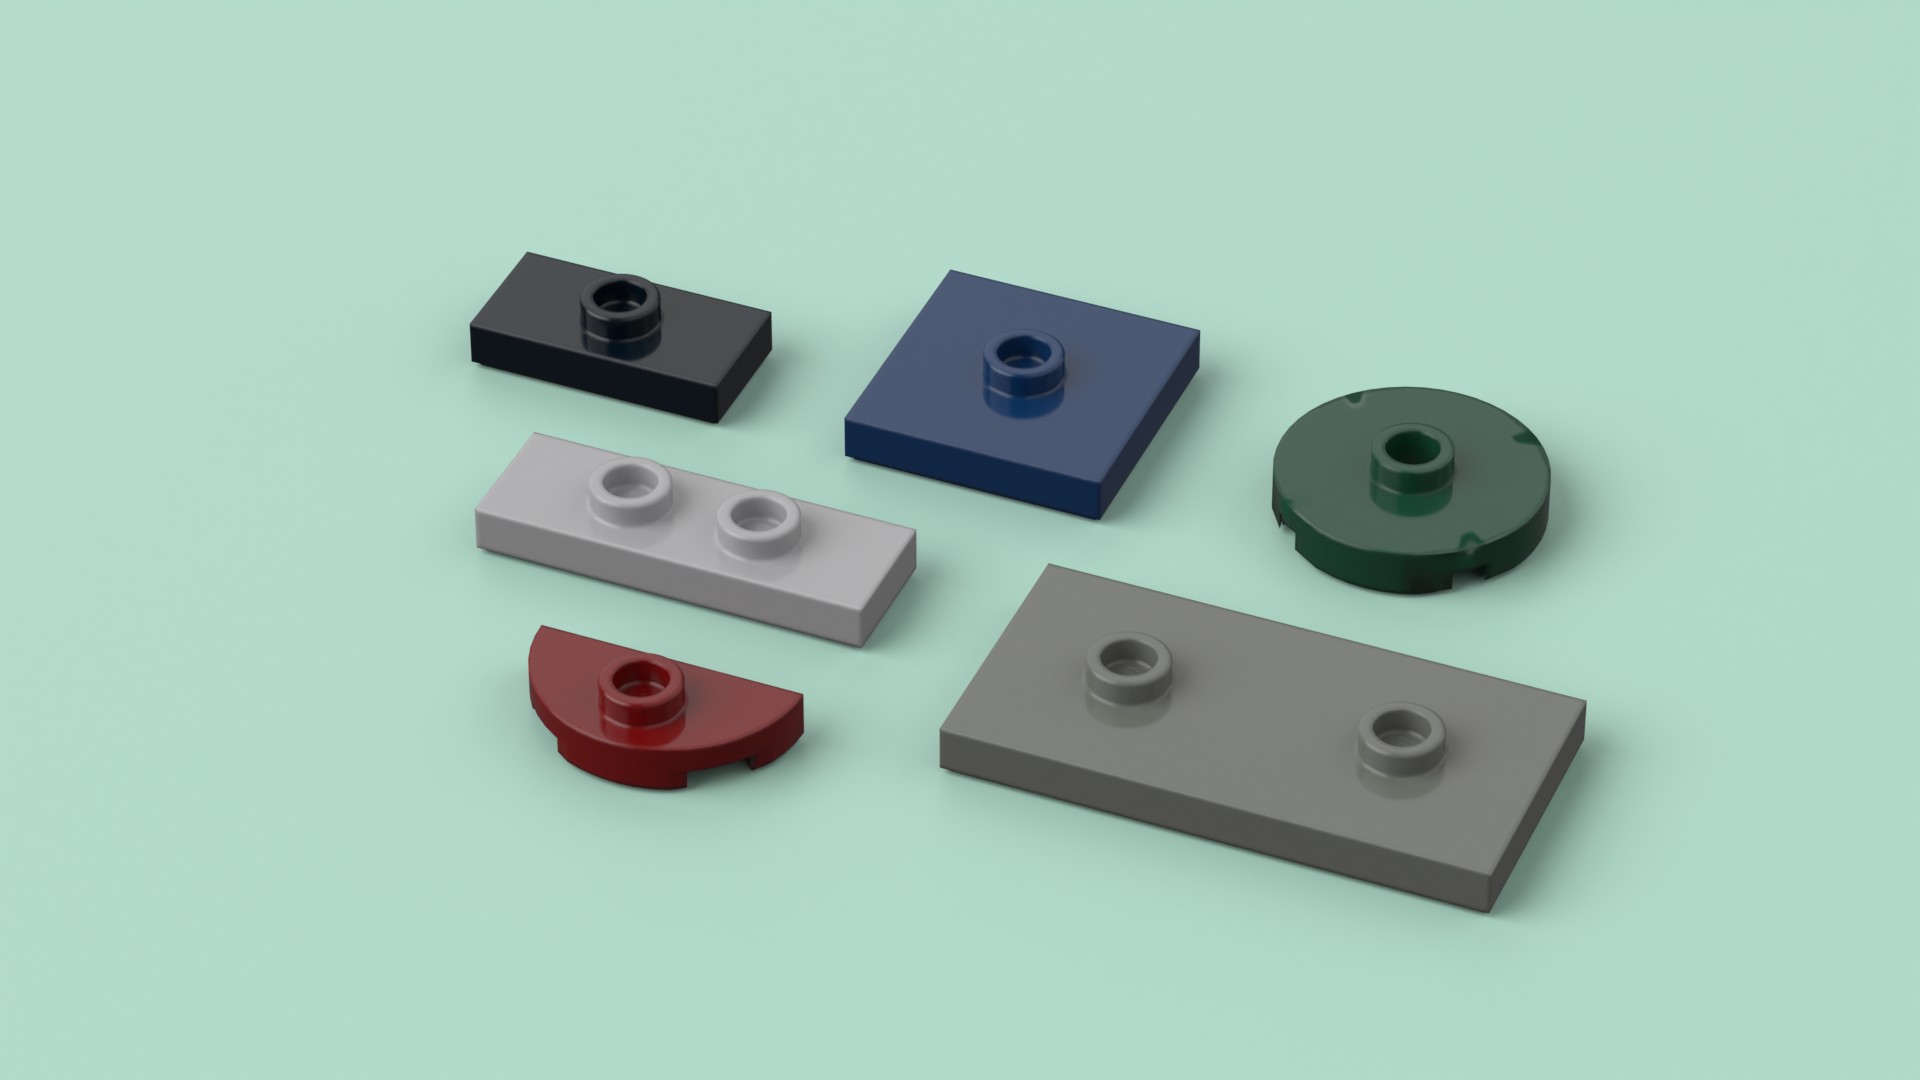
Part 87580 — The 2x2 Jumper
Introduced around 2009, this is a 2x2 plate with a single stud dead center. Where the 1x2 jumper shifts things in one direction, the 2x2 jumper shifts in two dimensions at once — half a stud over and half a stud forward. It's particularly useful for centering a 1x1 element (like a round plate or a decorated tile) on a 2x2 surface, or for creating offsets in both axes simultaneously.
You'll see it under centered minifigures on display stands, under decorative elements on tabletops in Modular Buildings, and anywhere a designer needed something precisely in the middle of a 2x2 area.
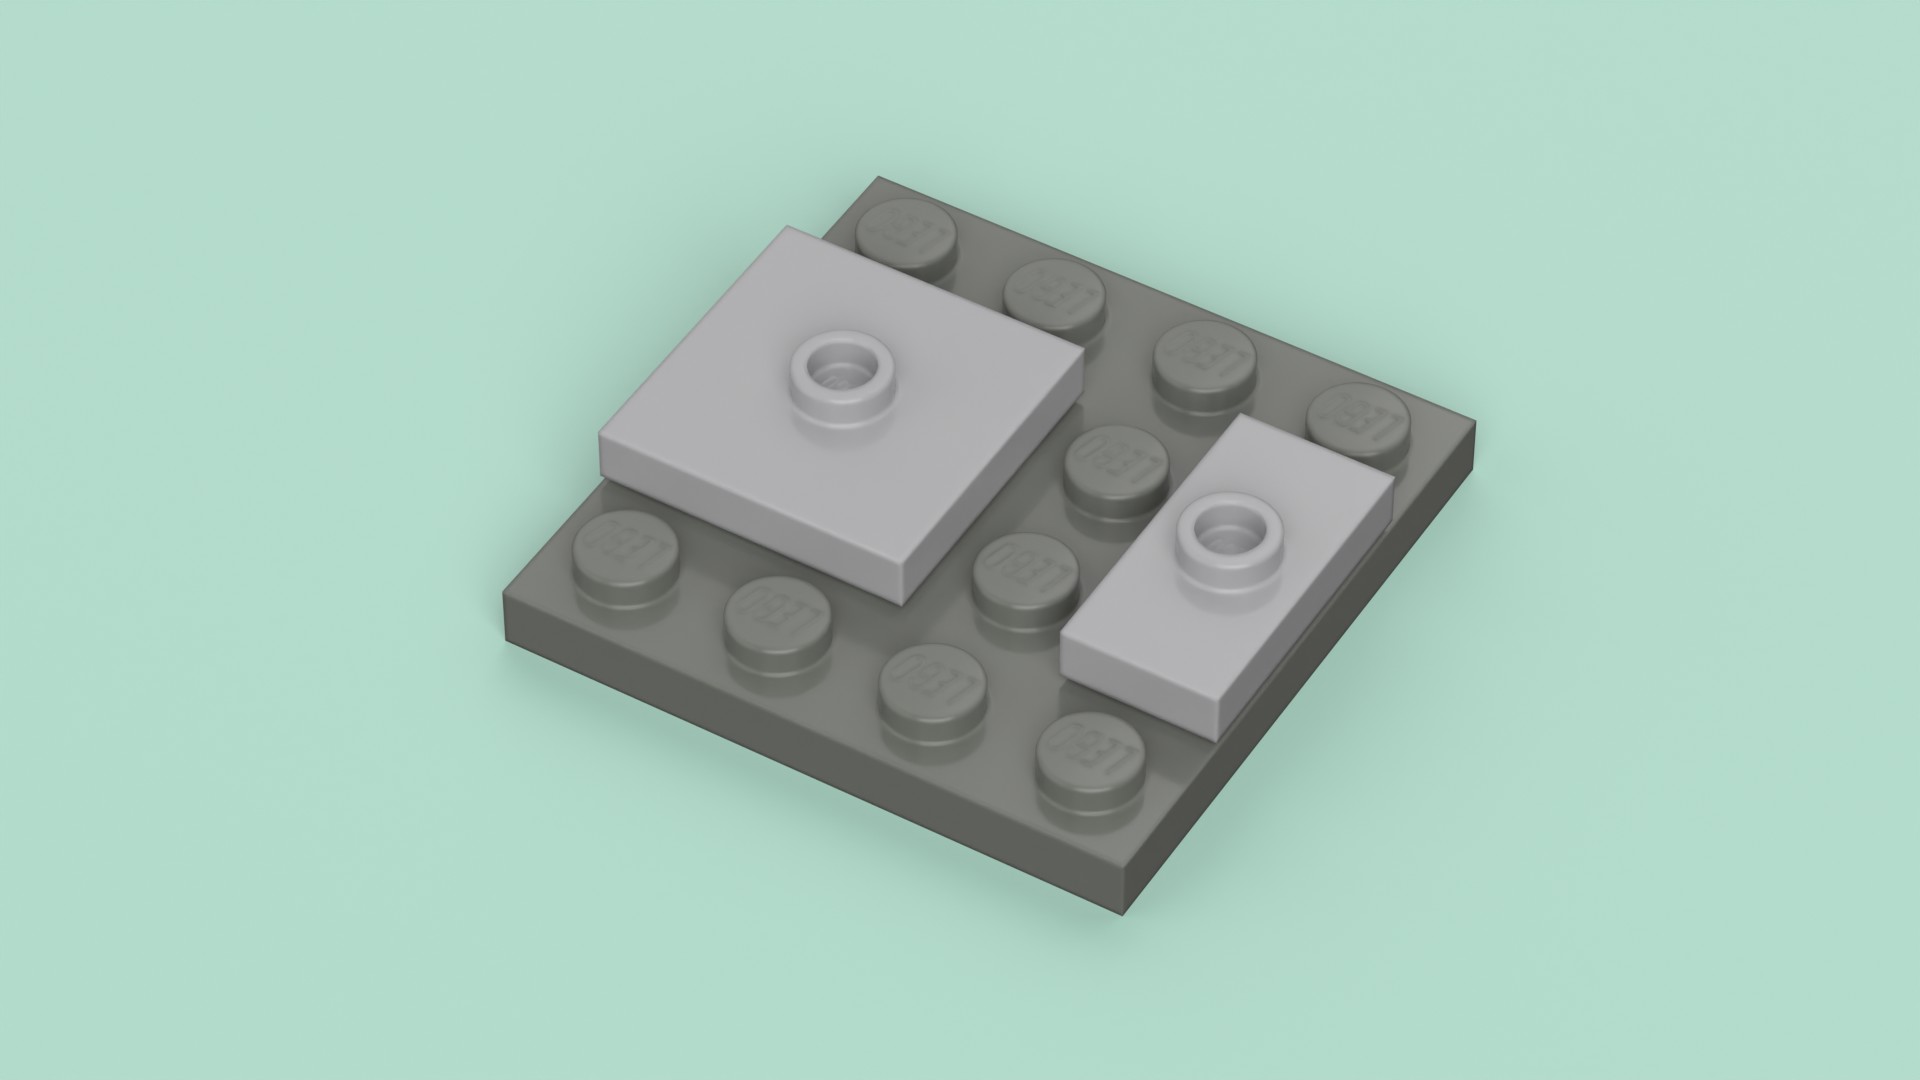
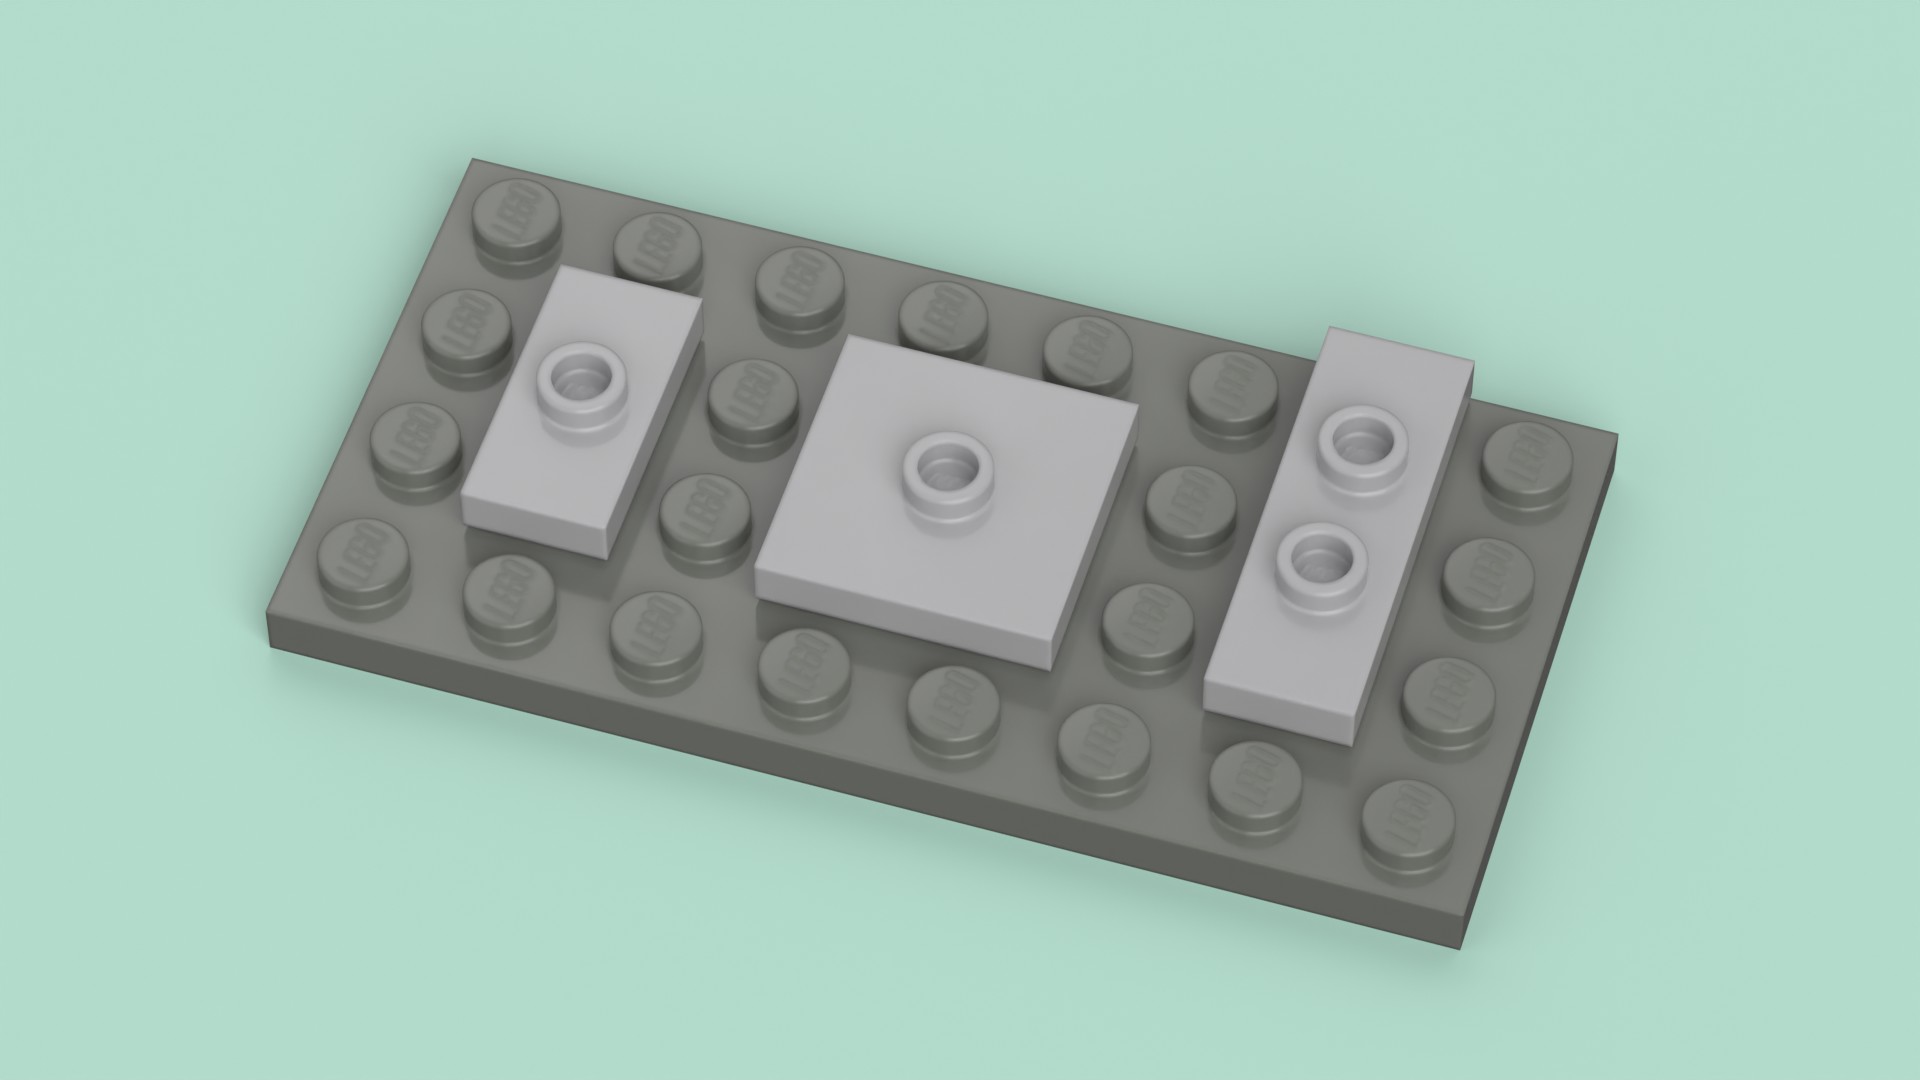
Part 34103 — The 1x3 Double Jumper (The Return Ticket)
This is the newest and least-known member of the family, but it solves an important problem. It's a 1x3 plate with two studs — spaced one stud apart, but shifted half a stud from the plate's edges. Think of it as the undo button. If a 1x2 jumper knocked you off the normal grid by half a stud, a 1x3 double jumper gets you back on.
There's also a 2x4 version (part 65509) that does the same thing at a larger scale. You won't see these as often, but when you need to return to normal grid alignment after a half-stud offset, they're invaluable.
Six Things Jumpers Actually Do
Every technique resource will tell you jumper plates create "half-stud offsets." Which is true, and also not very helpful if you're trying to figure out why you'd want one. Here's what that half-stud offset actually lets you do in practice.
1. Center Things That Don't Fit the Grid
LEGO's grid is rigid — every stud is one stud apart, and every element locks to those positions. Which means if you have a body that's an even number of studs wide and you want to place something dead center... you can't. The center point falls between stud positions. Your detail element has to sit left of center or right of center. Never truly centered.
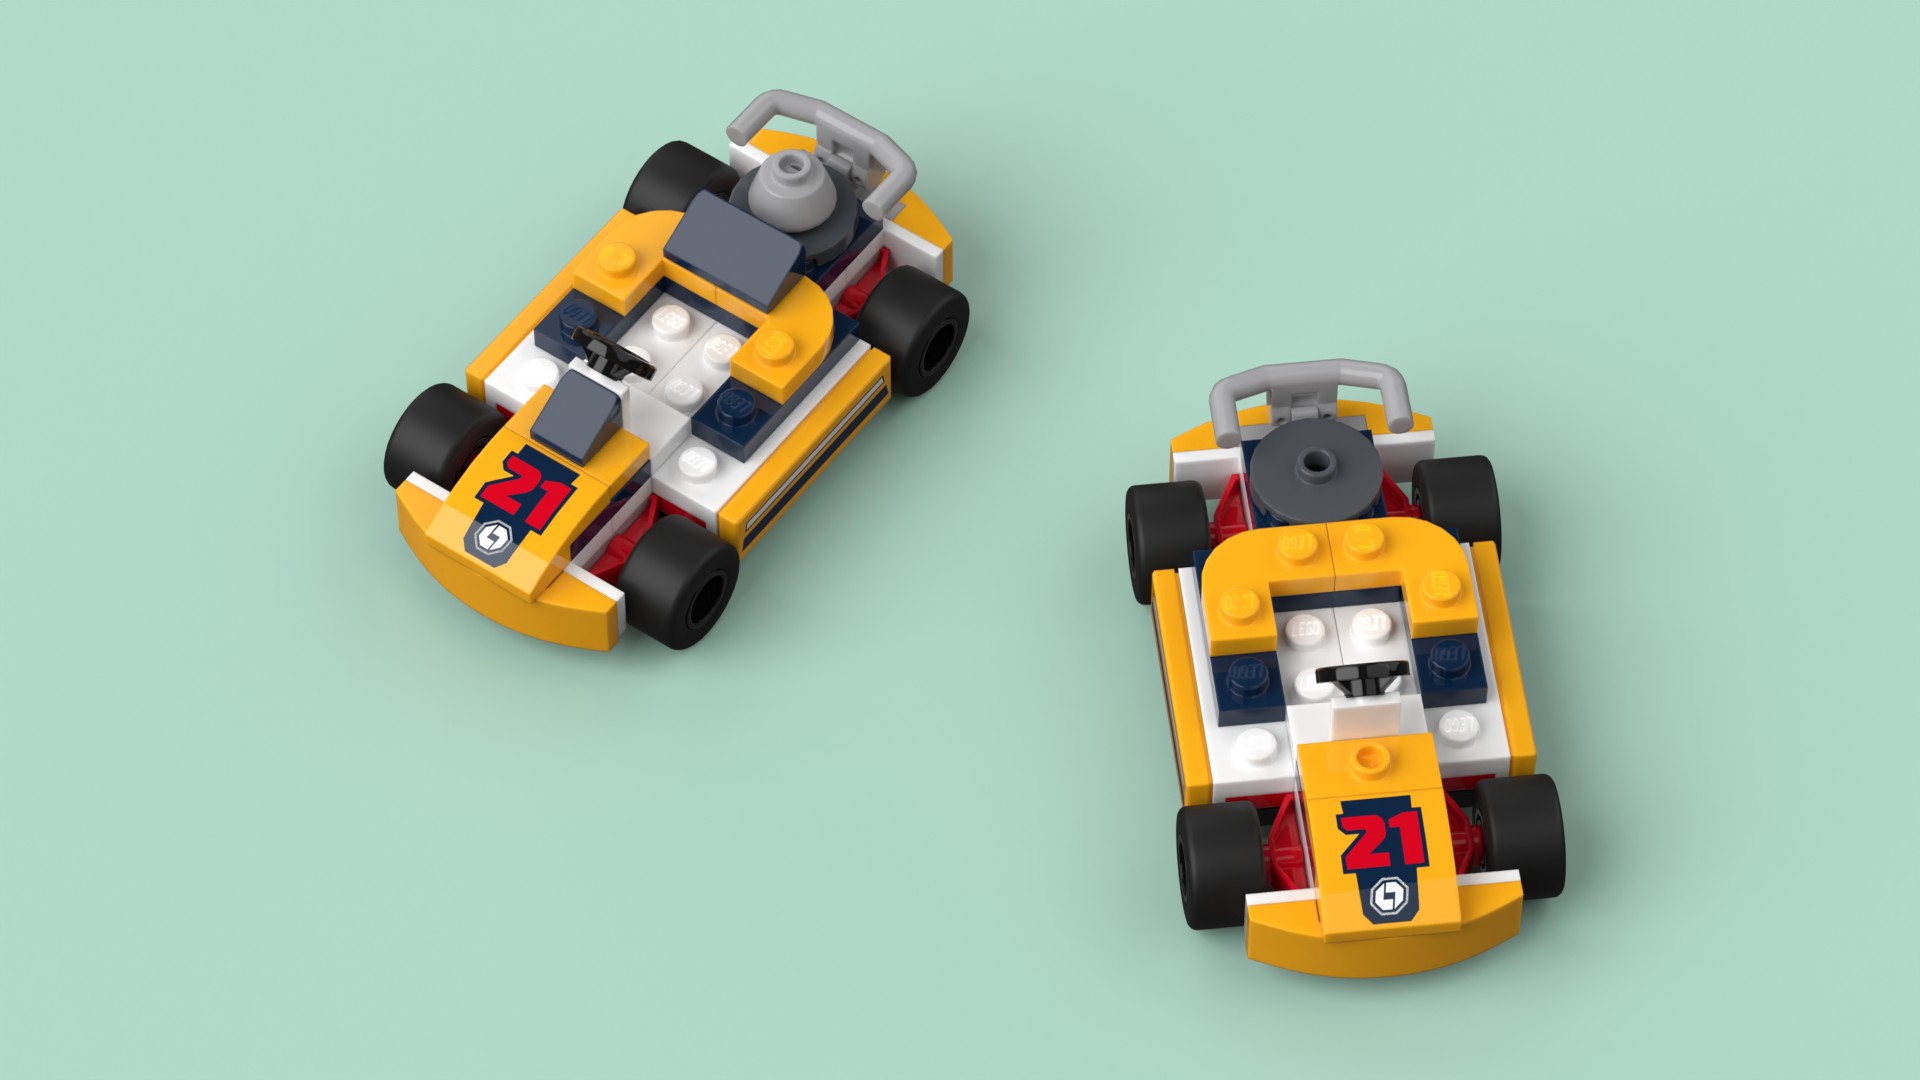
This shows up constantly in small vehicles. Take set 60400 Go-Karts — a $15 City set, nothing fancy. Look at the yellow kart's hood. That dark blue wedge piece above the number 21 sits perfectly centered on the body. The engine cone behind the seat? Also centered. On a normal plate, neither of those elements could land where they are — they'd be offset to one side, and the kart would look subtly wrong. But there are jumper plates in the layer below, and their centered studs put those details exactly where your eye expects them.
It's a trick that scales from go-karts to skyscrapers. Any time you need a 1-wide element centered on a 2-wide surface, or a 3-wide feature centered in a 4-wide space, the math doesn't work on the standard grid. Jumpers make it work.
2. Create Subtle Wall Depth
Full-stud recesses are dramatic. Sometimes you want something more restrained — a window frame set back just slightly from the surrounding wall, a panel that's barely inset but catches a shadow line. Half a stud of recess is remarkably effective for this. The depth is small enough that it reads as architectural detail rather than a structural step. Those Bookshop windowsills from the opening? That's all they are — half a stud of offset, creating a shadow that makes the whole facade feel layered.
The Modular Buildings use this constantly. Look at any recent modular's facade and you'll find sections where a row of tiles or bricks is shifted back by half a stud, creating subtle depth variations that make the building look real. The jumper plates doing this work are usually buried a few layers down, invisible in the finished model.

3. Lay a Proper Floor
A staggered tile floor — where alternating rows are offset by half a stud — is one of the most satisfying details you can add to a room interior or sidewalk. Jumpers in every other row create the offset. Without them, every tile lines up edge to edge in a rigid grid, like bathroom tiles from a cheap motel. With them, you get a pattern that reads as hardwood, herringbone, or cobblestone depending on the tile shapes and colors you use. If you've built any of the Modular Buildings, you've almost certainly laid one of these floors without realizing the jumpers were why it worked.

4. Smooth Out a Taper
When you need a structure to narrow as it rises — a tower, a pyramid, a rocket nose cone — the normal approach is to step inward by one stud per level. That works, but the steps are visible and can look jagged, especially at small scales. Jumpers let you step inward by half a stud instead, doubling the smoothness of the taper. The LEGO Architecture line uses this technique extensively for skyscrapers where accurate proportions matter.

5. Put a Minifig Exactly Where You Want It
A 2x2 jumper plate centers a minifigure on a 2-wide base. A 1x2 jumper centers them on a 1-wide footprint. Simple, immediately useful for display stands and vignettes.
But the real magic goes further than centering. Stick a minifig on a normal plate and both feet lock onto two studs. They face north, south, east, or west — cardinal directions only. The grid owns them.
Now put a jumper underneath one foot. Only one leg connects to a stud. The other leg floats free. And that single point of connection means the minifig can rotate to any angle you want. Not just 45 degrees — any degree. Three degrees east of north? Done. Turned slightly to look over a shoulder? Easy. Angled to face another minifig in conversation instead of standing at rigid attention? Finally possible.
This is one of those discoveries that changes how you think about minifigure scenes. On a standard baseplate, every figure in a crowd faces the same four directions like they're all doing military drill. Give them jumpers and they come alive — each one oriented slightly differently, interacting with the space and each other like actual people. It's the difference between a lineup and a scene.

6. Build Downward
The modern 1x2 jumper (15573) has a stud holder on its underside — a small rail that grips a regular stud from below. This means you can attach elements underneath a jumper, not just on top. Inverted plates, hanging decorations, balcony undersides — anything that needs to build downward from a half-stud-offset position is now stable and secure. Before this feature existed (pre-2013), builders had to use tiles and friction to achieve inverted half-stud connections, which was possible but fiddly. The modern jumper just handles it.
The One Gotcha: Getting Back On-Grid
There's a catch to the half-stud offset, and it's worth understanding before you start jumper-plating everything in sight. Once you've shifted something by half a stud, everything above it is also off-grid. The shifted section and the unshifted section no longer share stud positions. You can't just bridge across them with a normal plate — the studs won't line up.
The fix is simple: use another jumper. A second half-stud offset cancels the first one, snapping you back to the normal grid. You'll see this all the time in set instructions — a jumper below a recessed window section, and another jumper above it, so the wall returns to standard alignment and building continues normally.
The 1x3 double jumper (part 34103) makes this even cleaner. Because its two studs are already back on the standard grid, you can use it as a cap plate to close out an offset section in one step instead of arranging individual jumpers.
If you take away one thing from this section: jumpers come in pairs. One to go off-grid, one to come back. Plan for both.
Spot It in the Wild
Now that you know what jumpers do, the challenge is the same as it was with SNOT: go look at a set you've already built. Find a floor with a staggered tile pattern. Find a nameplate that's suspiciously well-centered. Find a facade with a section that's ever-so-slightly recessed. Look at the layer below the surface detail, and you'll find jumpers — one stud, dead center, doing the quiet work that makes everything above it look intentional.
They're in your City sets, your Star Wars builds, your Creator houses, your Modulars. Once you start spotting them, you'll realize they've been there the whole time. You just never had a reason to notice.
What's Next
Jumpers break the grid in one direction — they shift things sideways by half a stud. In our SNOT article, we covered the parts that redirect studs to face outward. But there's a third family of elements that ties both techniques together: tiles. They're the finishing layer — the smooth, studless surfaces that hide construction and give your build its final face. Next time in Skill Issues, we'll cover when to tile, what the different tile types do, and how tiles, jumpers, and SNOT work together to create the polished surfaces you see in modern sets.
Until then: go find a jumper in the wild. They're hiding in plain sight.